XAMPP for WindowsにOpenPNEをインストールする
OpenPNEはオープンソースのSNSソフトウエアで、社内SNSやソーシャルメディア、ファンサイトなどを構築することができます。ユーザーインタフェースはmixiに似ています。
が、OpenPNEがどのようなものか全く分かってないので、とりあえずXAMPP for Windowsにインストールしてみました。インストールに使ったOpenPNEのバージョンは3.4.9.2(2011年1月時点)です。XAMPPはCドライブ直下にインストールしている前提で解説します。
OpenPNEを調べるきっかけは、Twitterで「OpenPNEとMovable Typeのコミュニティ機能のどっちがいい?」みたいなポストがあったからです。
ちなみに、OpenPNEはアクセスコントロール(日記などの公開範囲指定)がデフォルトで用意されています。よってクローズドなコミュニティであればOpenPNE、Web全体に公開するコミュニティであればMovable Typeといったところでしょうか。
1.OpenPNEのダウンロード
OpenPNEの公式サイトから最新版をダウンロードし、C:¥xampp¥htdocs配下に展開します。このエントリーではC:¥xampp¥htdocs¥OpenPNE3とします。
2.php.iniの修正
C:¥xampp¥php¥php.iniのmemory_limitが32Mになっている場合、OpenPNEのインストールが失敗する可能性があるので64Mに変更します。
変更前
memory_limit = 32M ; Maximum amount of memory a script may consume (16MB)変更後
memory_limit = 64M ; Maximum amount of memory a script may consume (16MB)3.データベース作成
phpMyAdminを使ってOpenPNE用のデータベースを作成します。設定内容は以下のもので説明を進めます。
- データベース名:openpne
- ユーザー名:openpne
- パスワード:openpne
- ホスト:localhost
4.PEARのインストール
OpenPNEではsymfonyを利用します。symfonyをインストールするため、PEAR(PHP Extension and Application Repository)のインストールを事前に行います。PEARのインストールは¥xampp¥php¥go-pear.batを実行します(ダブルクリックでもOK)。
PRARのインストール画面は以下を参考にしてください。
C:¥xampp¥php>go-pear.bat

Are you installing a system-wide PEAR or a local copy?
(system|local) [system] : 何も入力せずリターン

Below is a suggested file layout for your new PEAR installation.  To
change individual locations, type the number in front of the
directory.  Type 'all' to change all of them or simply press Enter to
accept these locations.

 1. Installation base ($prefix)   : C:¥xampp¥php
 2. Binaries directory            : C:¥xampp¥php
 3. PHP code directory ($php_dir) : C:¥xampp¥php¥pear
 4. Documentation directory       : C:¥xampp¥php¥pear¥docs
 5. Data directory                : C:¥xampp¥php¥pear¥data
 6. Tests directory               : C:¥xampp¥php¥pear¥tests
 7. Name of configuration file    : C:¥Windows¥pear.ini
 8. Path to CLI php.exe           : C:¥xampp¥php¥.

1-8, 'all' or Enter to continue: 何も入力せずリターン
Beginning install...
Configuration written to C:¥Windows¥pear.ini...
Initialized registry...
Preparing to install...
installing phar://go-pear.phar/PEAR/go-pear-tarballs/Archive_Tar-1.3.1.tar...
installing phar://go-pear.phar/PEAR/go-pear-tarballs/Console_Getopt-1.2.tar...
installing phar://go-pear.phar/PEAR/go-pear-tarballs/PEAR-1.4.11.tar...

Warning: Cannot use a scalar value as an array in phar://go-pear.phar/PEAR/Depen
dencyDB.php on line 230

Warning: Cannot use a scalar value as an array in phar://go-pear.phar/PEAR/Depen
dencyDB.php on line 230
…中略…
Warning: Invalid argument supplied for foreach() in phar://go-pear.phar/PEAR/Dep
endency2.php on line 1040
install ok: channel://pear.php.net/Archive_Tar-1.3.1
install ok: channel://pear.php.net/Console_Getopt-1.2
install ok: channel://pear.php.net/PEAR-1.4.11
PEAR: Optional feature webinstaller available (PEAR's web-based installer)
PEAR: Optional feature gtkinstaller available (PEAR's PHP-GTK-based installer)
PEAR: Optional feature gtk2installer available (PEAR's PHP-GTK2-based installer)

To install use "pear install pear/PEAR#featurename"

** WARNING! Old version found at C:¥xampp¥php, please remove it or be sure to us
e the new c:¥xampp¥php¥pear.bat command

The 'pear' command is now at your service at c:¥xampp¥php¥pear.bat

** The 'pear' command is not currently in your PATH, so you need to
** use 'c:¥xampp¥php¥pear.bat' until you have added
** 'C:¥xampp¥php' to your PATH environment variable.

Run it without parameters to see the available actions, try 'pear list'
to see what packages are installed, or 'pear help' for help.

For more information about PEAR, see:

  http://pear.php.net/faq.php
  http://pear.php.net/manual/

Thanks for using go-pear!

* WINDOWS ENVIRONMENT VARIABLES *
For convenience, a REG file is available under C:¥xampp¥php¥PEAR_ENV.reg .
This file creates ENV variables for the current user.

Double-click this file to add it to the current user registry.

続行するには何かキーを押してください . . .
インストールが完了すると、¥xampp¥php¥PEARフォルダが作られます。
5.symfonyのインストール
symfonyはPHP5上で動作するアプリケーションフレームワークです。
channel-discover コマンドを実行して、symfonyのチャネルに接続します。
C:¥xampp¥php>pear channel-discover pear.symfony-project.com
Adding Channel "pear.symfony-project.com" succeeded
Discovery of channel "pear.symfony-project.com" succeeded
続いて、symfonyをインストールします。インストールを開始してから「install ok」のメッセージが出るまで数十秒かかります。
C:¥xampp¥php>pear install symfony/symfony
downloading symfony-1.4.8.tgz ...
Starting to download symfony-1.4.8.tgz (3,177,818 bytes)
....................................................................................
.............................................. done:3,177,818 bytes
install ok: channel://pear.symfony-project.com/symfony-1.4.8
6.OpenPNEのインストール
OpenPNEのインストールは、以下のように実行します。インストール途中でデータベースの情報を入力しなければならないので、赤色に示した内容を入力してリターンしてください。「Y」を入力した後、インストールに数分かかります。
C:¥xampp¥php>php C:¥xampp¥htdocs¥OpenPNE3¥symfony openpne:install

  Choose DBMS:
  - mysql
  - pgsql (unsupported)
  - sqlite (unsupported)

mysql

  Type database username

openpne

  Type database password (optional)

openpne

  Type database hostname

localhost

  Type database port number (optional)

(何も入力せずリターン)

  Type database name

openpne

  Type database socket path (optional)

(何も入力せずリターン)

  The DBMS                 : mysql
  The Database Username    : openpne
  The Database Password    : ******
  The Database Hostname    : localhost
  The Database Port Number :
  The Database Name        : openpne
  The Database Socket      :

  Is it OK to start this task? (Y/n)

Y
>> plugin    installing plugin "opAuthMailAddressPlugin"
>> opPluginManager Plugin is already installed
>> plugin    installing plugin "opAuthMobileUIDPlugin"
>> opPluginManager Plugin is already installed
>> plugin    installing plugin "opAuthOpenIDPlugin"
>> opPluginManager Plugin is already installed
>> plugin    installing plugin "opCommunityTopicPlugin"
>> opPluginManager Plugin is already installed
>> plugin    installing plugin "opWebAPIPlugin"
>> opPluginManager Plugin is already installed
>> plugin    installing plugin "opDiaryPlugin"
>> opPluginManager Plugin is already installed
>> plugin    installing plugin "opBlogPlugin"
>> opPluginManager Plugin is already installed
>> plugin    installing plugin "opOpenSocialPlugin"
>> opPluginManager Plugin is already installed
>> plugin    installing plugin "opAshiatoPlugin"
>> opPluginManager Plugin is already installed
>> plugin    installing plugin "opMessagePlugin"
>> opPluginManager Plugin is already installed
>> plugin    installing plugin "opAlbumPlugin"
>> opPluginManager Plugin is already installed
>> chmod 777 C:¥xampp¥htdocs¥OpenPNE3¥cache
>> chmod 777 C:¥xampp¥htdocs¥OpenPNE3¥log
>> chmod 777 C:¥xampp¥htdocs¥OpenPNE3/symfony
>> chmod 777 C:/xampp/htdocs/OpenPNE3/cache/.pear
>> chmod 777 C:/xampp/htdocs/OpenPNE3/cache/.pear/opAlbumPlugin-0.9.3
>> chmod 777 C:/xampp/htdocs/OpenPNE3/cache/.pear/opAlbumPlugin-0.9.3/apps
…中略…
>> file+     C:¥xampp¥htdocs¥OpenPNE3¥web¥sfProtoculousPlugin¥js/sound.js
>> file+     C:¥xampp¥htdocs¥OpenPNE3¥web¥sfProtoculousPlugin¥js/unittest.js
>> plugin    Configuring plugin - sfSymfonyTemplatingViewPlugin
>> installer installation is completed!
2項のメモリ設定が不足していると次のようなエラーが表示されます。
Fatal error: Allowed memory size of 33554432 bytes exhausted (tried to allocate 140 bytes) in C:¥xampp¥htdocs¥OpenPNE3¥lib¥model¥doctrine¥op
CommunityTopicPlugin¥base¥BaseCommunityEventComment.class.php on line 86
7.ユーザーによるOpenPNEのアクセス
OpenPNEの利用ユーザーは、このエントリーの設定の場合、次のURLにアクセスします。
http://localhost/OpenPNE3/web/
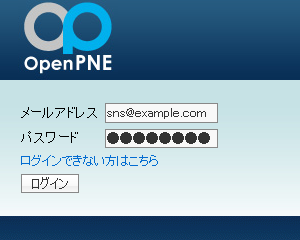
メールアドレス:sns@example.com
パスワード:password
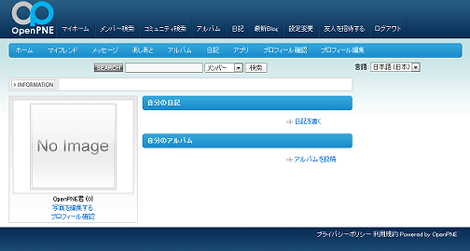
ログインに成功すれば次のような画面が表示されます。
「sns@example.com」というアドレスをもつユーザーはOpenPNEに登録されている仮ユーザーです。
8.管理者によるOpenPNEのアクセス
管理者は、このエントリーの設定の場合、次のURLにアクセスします。
http://localhost/OpenPNE3/web/pc_backend.php
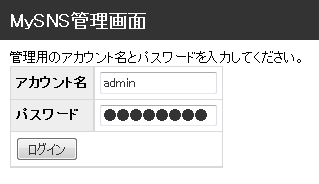
メールアドレス:admin
パスワード:password
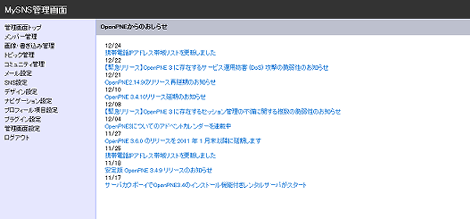
ログインに成功すれば次のような画面が表示されます。
9.参考サイト
参考サイトは以下です。ありがとうございました。
- WebTecNote - Windows版XAMPP + OpenPNE インストールメモ
- OpenPNE3.2 セットアップ手順
- CodeZine - symfony入門(1):symfonyで始めるPHPフレームワーク
